Eureka 서버 구성
1. 설명
이전 글 기반에 설정을 추가하였고, 소스 코드를 GitHub에 업로드 하였다.
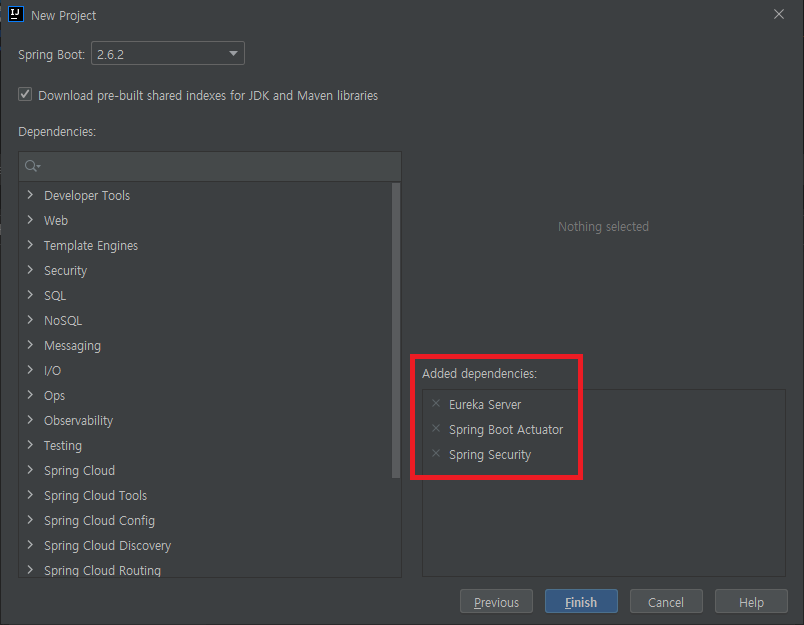
2. 프로젝트 생성
- New Project → Spring Initializer
3. Dependencies 추가
Eureka Server
Spring Boot Actuator
Spring Security
4. 설정
1) EurekaApplication.java 설정
@EnableEurekaServer 어노테이션을 추가한다.
1
2
3
4
5
6
7
8
9
10
11
12
13
14
15
package com.example.eureka;

import org.springframework.boot.SpringApplication;
import org.springframework.boot.autoconfigure.SpringBootApplication;
import org.springframework.cloud.netflix.eureka.server.EnableEurekaServer;

@EnableEurekaServer
@SpringBootApplication
public class EurekaApplication {

    public static void main(String[] args) {
        SpringApplication.run(EurekaApplication.class, args);
    }

}
2) WebSecurityConfig.java 추가
보안을 위해 WebSecurityConfig.java 파일을 추가한다.
1
2
3
4
5
6
7
8
9
10
11
12
13
14
15
16
17
18
19
package com.example.eureka;

import org.springframework.security.config.annotation.web.builders.HttpSecurity;
import org.springframework.security.config.annotation.web.configuration.EnableWebSecurity;
import org.springframework.security.config.annotation.web.configuration.WebSecurityConfigurerAdapter;

@EnableWebSecurity
public class WebSecurityConfig extends WebSecurityConfigurerAdapter {

    @Override
    protected void configure(HttpSecurity http) throws Exception {
        http.csrf()
                .disable()
                .authorizeRequests()
                .anyRequest().authenticated()
                .and()
                .httpBasic();
    }
}
3) application.properties 설정
eureka 설정을 추가한다.
eureka.server.enable-self-preservation- 일시적인 네트워크 장애로 인한 서비스 해제 막기 위한 자기 보호 모드 (디폴트 true, 운영에선 반드시 true로 설정 필요)
- 원래는 해당 시간 안에 하트비트가 일정 횟수 이상 들어오지 않아야 서비스 해제하는데 false 설정 시 하트비트가 들어오지 않으면 바로 서비스 제거
eureka.client.register-with-eureka- 레지스트리에 자신을 등록할지에 대한 여부 (디폴트 true)
- 클러스터링 모드의 Eureka Server 구성은 서로 peering 구성이 가능 (Eureka Server 설정에 정의된 peering 노드를 찾아서 레지스트리 정보의 sync를 맞춤)
- 독립 실행형 모드(standalone)에서는 peering 실패가 발생하므로 Eureka Client 측 동작을 끔
eureka.client.fetch-registry- 레지스트리에 있는 정보를 가져올지에 대한 여부 (디폴트 true)
- true로 설정 시 검색할 때마다 Eureka Server를 호출하는 대신 레지스트리가 로컬로 캐싱 됨
- 30초마다 Eureka Client가 유레카 레지스트리 변경 사항 여부 재확인함
1
2
3
4
5
6
7
8
9
spring.application.name=eureka
server.port=8761

eureka.server.enable-self-preservation=true
eureka.client.register-with-eureka=false
eureka.client.fetch-registry=false

spring.security.user.name=admin
spring.security.user.password=admin
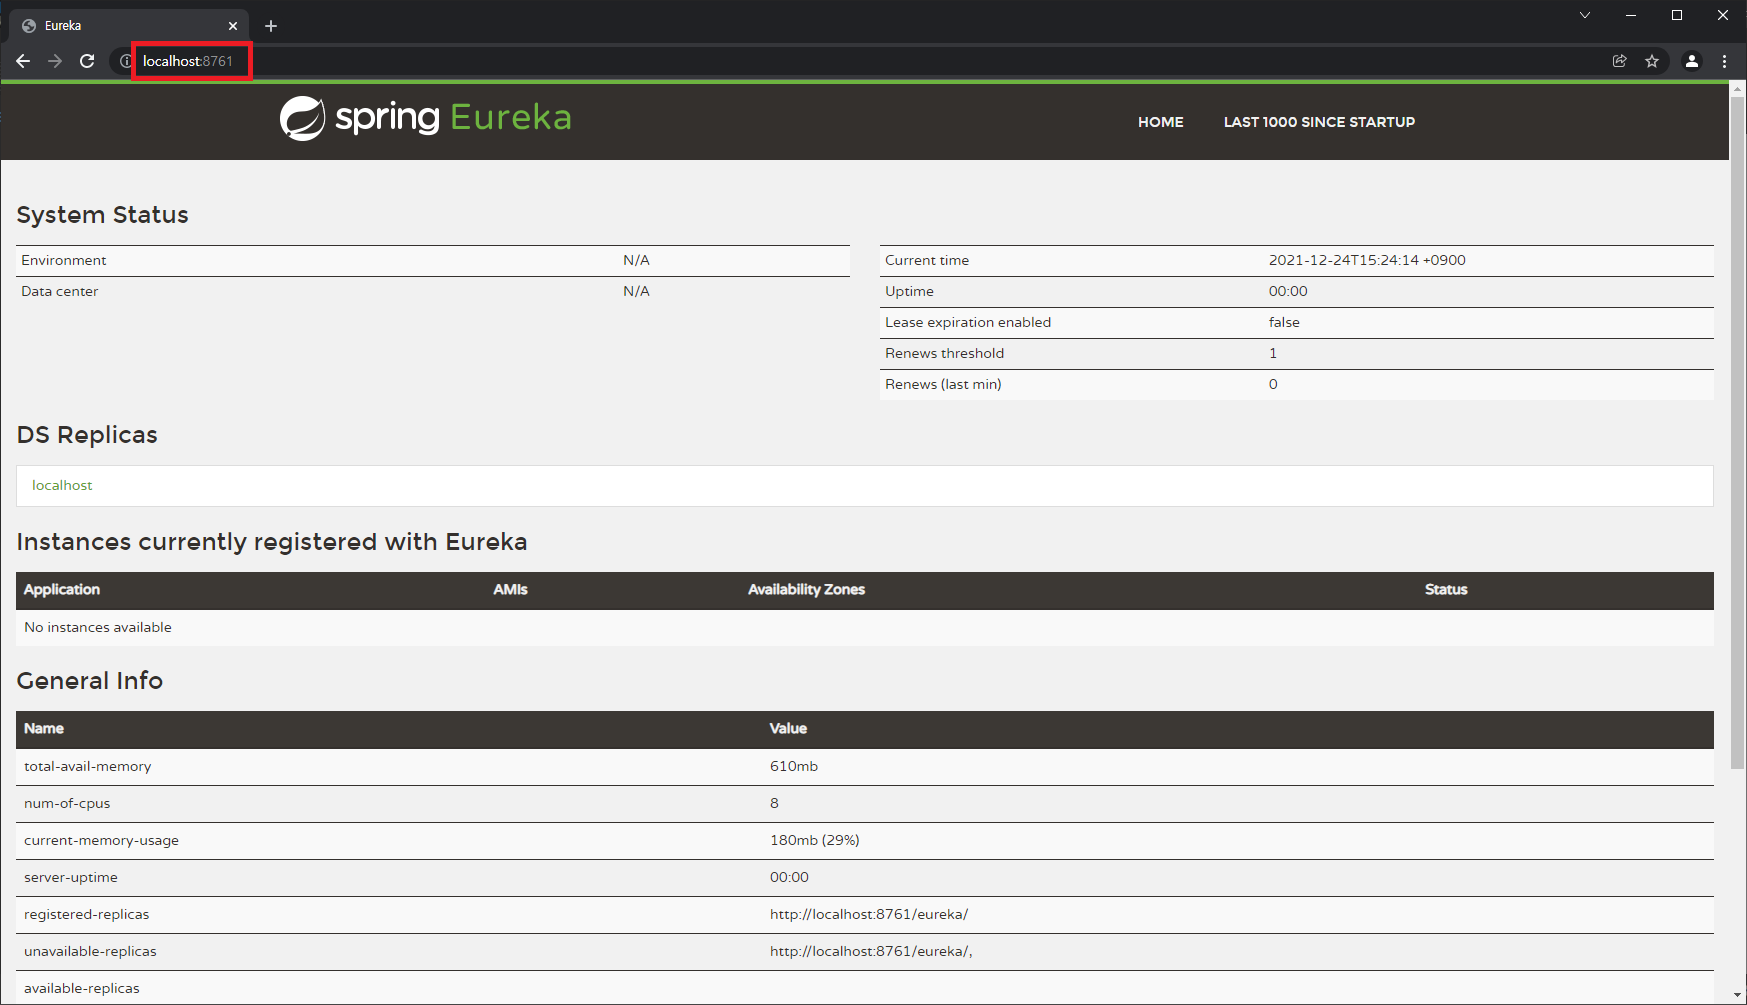
5. 실행
http://localhost:8761로그인
- admin / admin
[출처 및 참고]
This post is licensed under CC BY 4.0 by the author.


