CentOS 8에 PostgreSQL 13 설치
CentOS 8에 PostgreSQL 13 설치
1. PostgreSQL Yum Repository 추가
YUM 저장소는 Linux 배포의 CentOS 및 RHEL 제품군을 모두 지원한다. 추가되면 PostgreSQL의 지원 기간 동안 지원되는 모든 PostgreSQL 버전에 대한 자동 업데이트를 제공한다.
1
[root@localhost ~]# dnf install https://download.postgresql.org/pub/repos/yum/reporpms/EL-8-x86_64/pgdg-redhat-repo-latest.noarch.rpm

2. PostgreSQL 13 설치
1) 다른 버전이 포함된 PostgreSQL AppStream repository 비활성화
1
[root@localhost ~]# dnf -qy module disable postgresql
2) 활성화 된 저장소 목록을 확인
1
[root@localhost ~]# dnf repolist

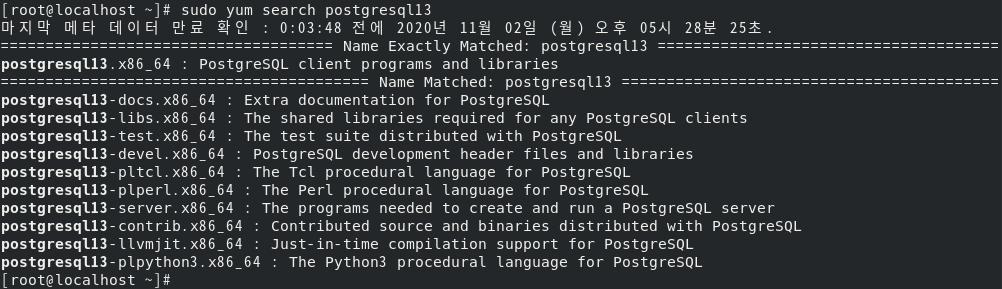
3) PostgreSQL 13 패키지 사용 여부 확인
1
[root@localhost ~]# yum search postgresql13
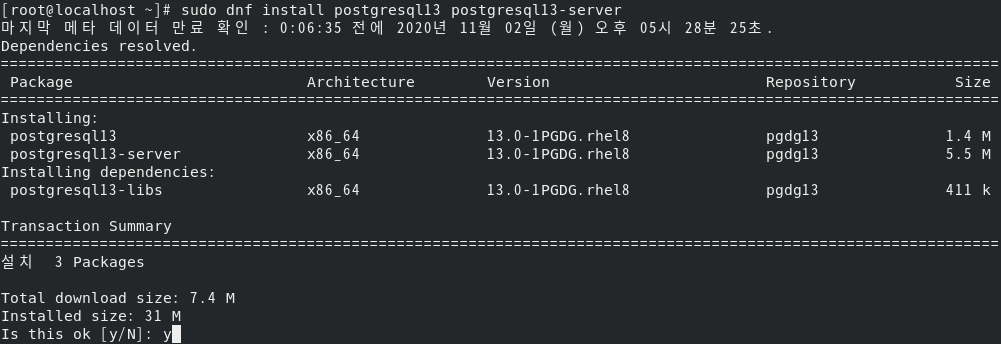
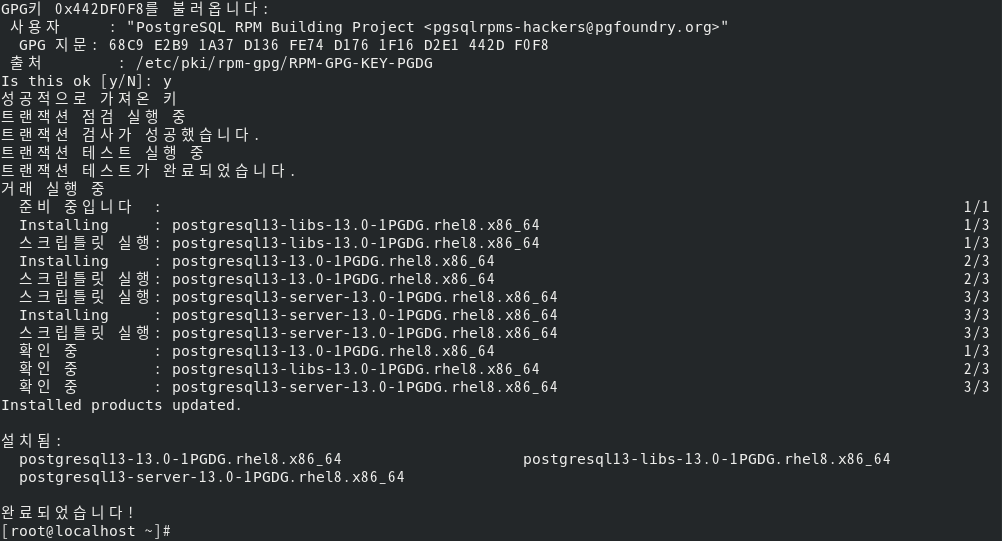
4) 설치
1
[root@localhost ~]# dnf install postgresql13 postgresql13-server
3. 데이터베이스 서비스 초기화 및 시작
1) 데이터베이스 서버를 사용하려면 PostgreSQL 데이터베이스 초기화
1
[root@localhost ~]# /usr/pgsql-13/bin/postgresql-13-setup initdb

- 데이터베이스 구성 파일 경로: /var/lib/pgsql/13/data/postgresql.conf

2) PostgreSQL 데이터베이스 서버를 시작하고 부팅시 시작 설정
1
[root@localhost ~]# systemctl enable --now postgresql-13

3) 서비스 상태 확인
1
[root@localhost ~]# systemctl status postgresql-13

4. 관리자 암호 설정
1
2
[root@localhost ~]# su - postgres
[postgres@localhost ~]$ psql -c "alter user postgres with password 'StrongDBPassword'"

5. 원격 데이터베이스 연결 활성화 (선택 사항)
1) Listen 주소를 서버 IP 주소로 설정하거나 모든 인터페이스에 대해 “*“를 설정
1
[root@localhost ~]# vi /var/lib/pgsql/13/data/postgresql.conf
1
2
# 59 행
listen_addresses = '192.168.10.10'
2) 원격 연결을 허용하도록 설정
1
[root@localhost ~]# vi /var/lib/pgsql/13/data/pg_hba.conf
1
2
3
4
5
# Accept from anywhere (Not Recommended)
host all all 0.0.0.0/0 md5

# Accept from trusted subnet (Recommended Setting)
host all all 192.168.18.0/24 md5
3) 변경사항 저장 후 데이터베이스 서비스 재시작
1
[root@localhost ~]# systemctl restart postgresql-13
[출처 및 참고]
This post is licensed under CC BY 4.0 by the author.