Jenkins에 SonarQube 연동
1. 환경
Jenkins 2.452.3
SonarQube Community Edition v9.9.6 (build 92038)
2. SonarQube 설정
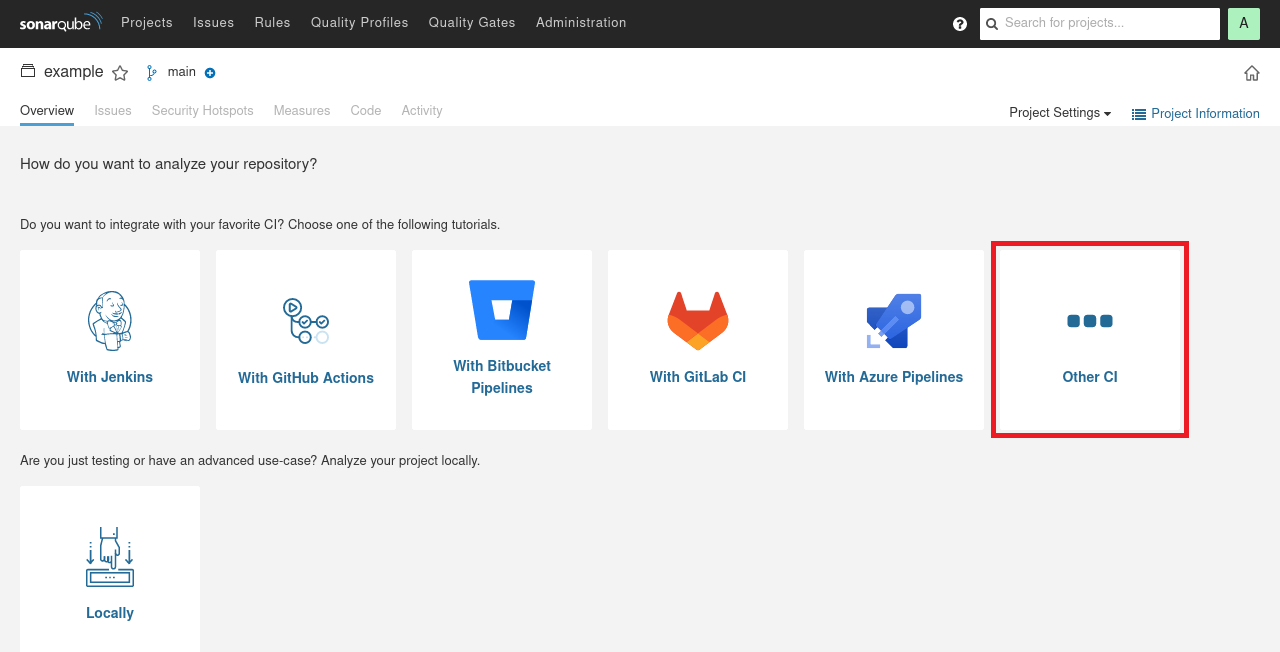
1) 프로젝트 생성
2) Repository 설정
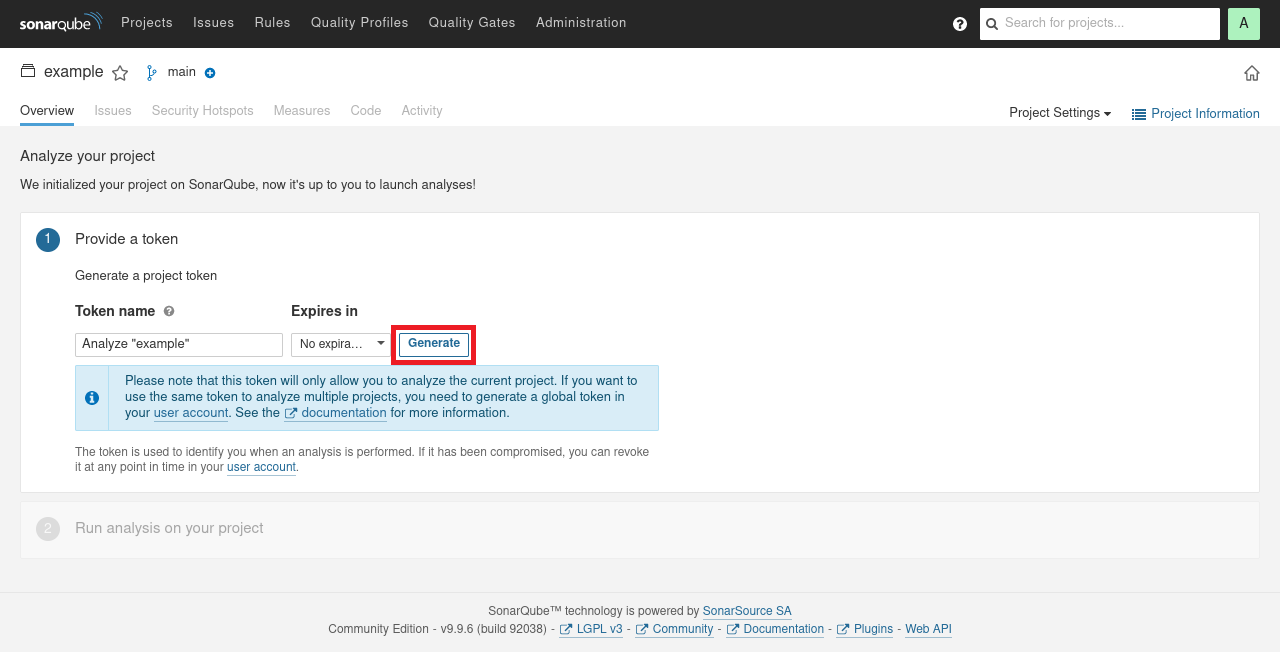
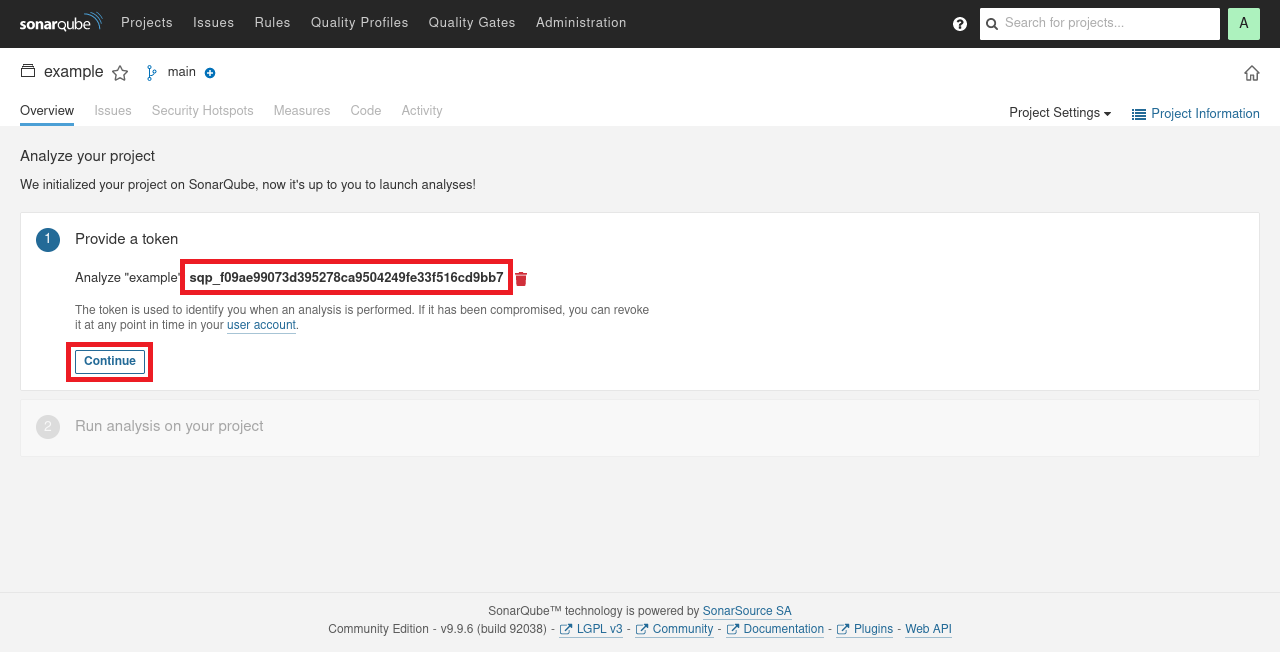
- Token 생성
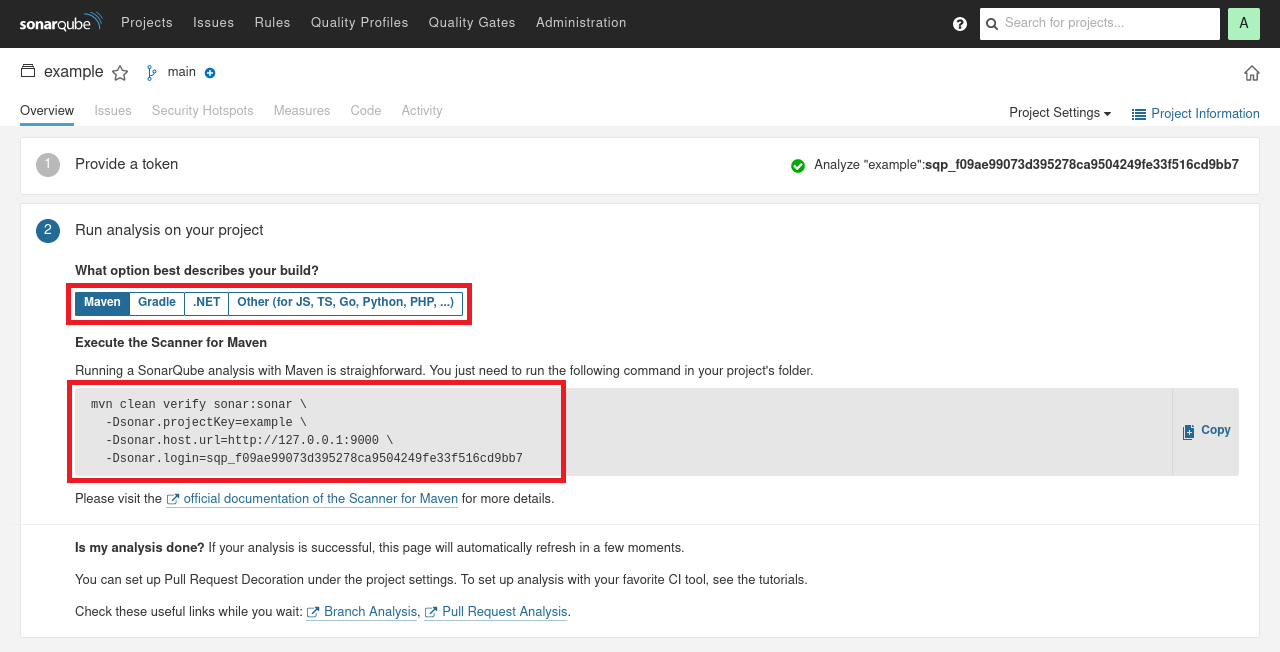
- Analysis 정보 복사
3. Jenkins 설정
1) Plugin 설치
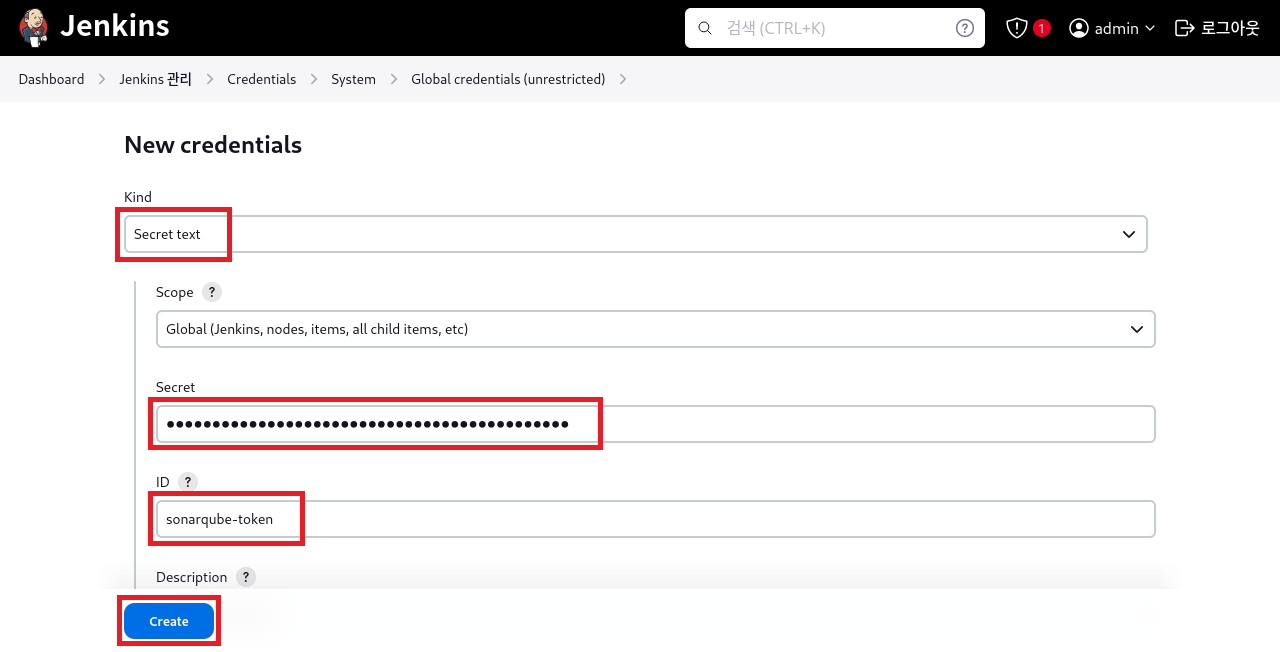
2) Credentials 등록
Secret 값은 SonarQube 프로젝트에서 생성한 Provide a Token값 이다.
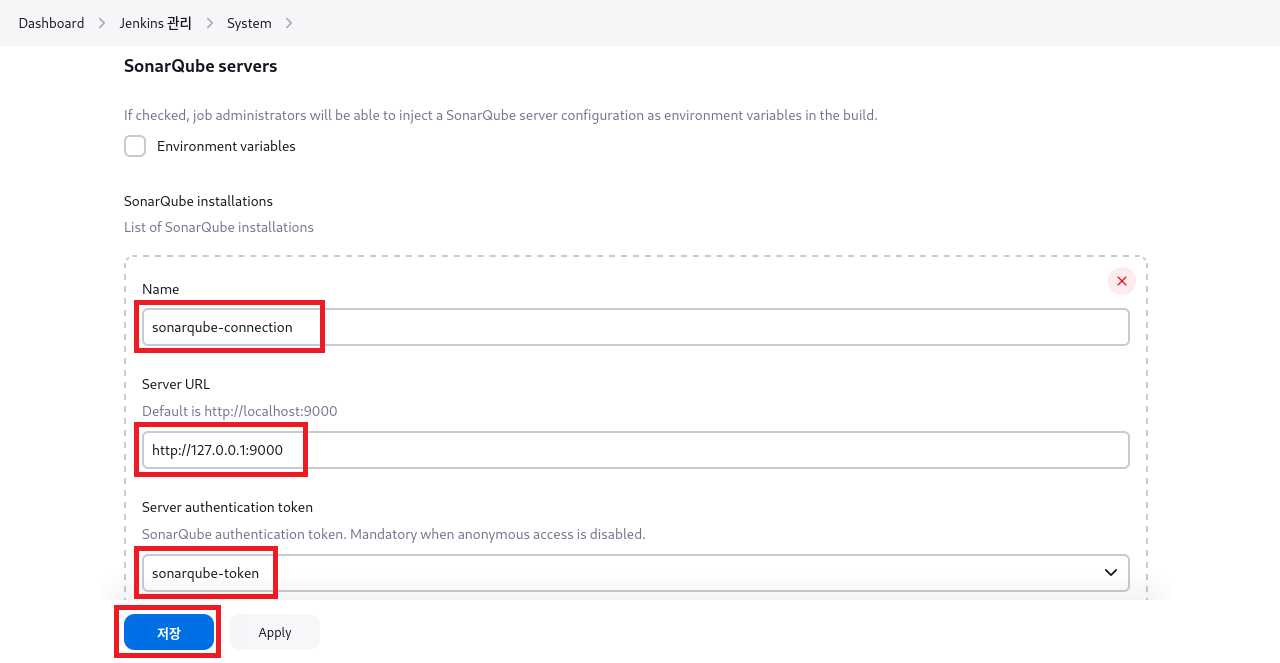
3) System 설정
SonarQube servers 접속 설정한다.
4. Jenkinsfile 설정
GitLab 프로젝트 Jenkinsfile의 pipeline에 SonarQube Analysis stage를 추가한다.
Gradle은 build.gradle 파일에 plugin도 추가한다.
stage는 SonarQube에서 생성한 Run analysis on your project 항목이다.
1) Maven 설정
- Jenkinsfile
1
2
3
4
5
6
7
8
9
10
11
12
stage('SonarQube Analysis') {
    steps {
        script {
            sh '''
            mvn clean verify sonar:sonar \
            -Dsonar.projectKey=example \
            -Dsonar.host.url=http://127.0.0.1:9000 \
            -Dsonar.login=sqp_1183808f2648581916d6763aadad2a592cc99598
            '''
        }
    }
}
2) Gradle 설정
Plugins는 최신버전으로 추가한다. 오래된 버전은 빌드 오류가 난다.
- build.gradle
1
2
3
plugins {
    id 'org.sonarqube' version '5.1.0.4882'
}
- Jenkinsfile
1
2
3
4
5
6
7
8
9
10
11
12
stage('SonarQube Analysis') {
    steps {
        script {
            sh '''
            ./gradlew sonar --warning-mode=all \
            -Dsonar.projectKey=example2 \
            -Dsonar.host.url=http://127.0.0.1:9000 \
            -Dsonar.login=sqp_5a3d6566c77cc60dd5b163a6f829b21e34b73041
            '''
        }
    }
}
5. 빌드 및 확인
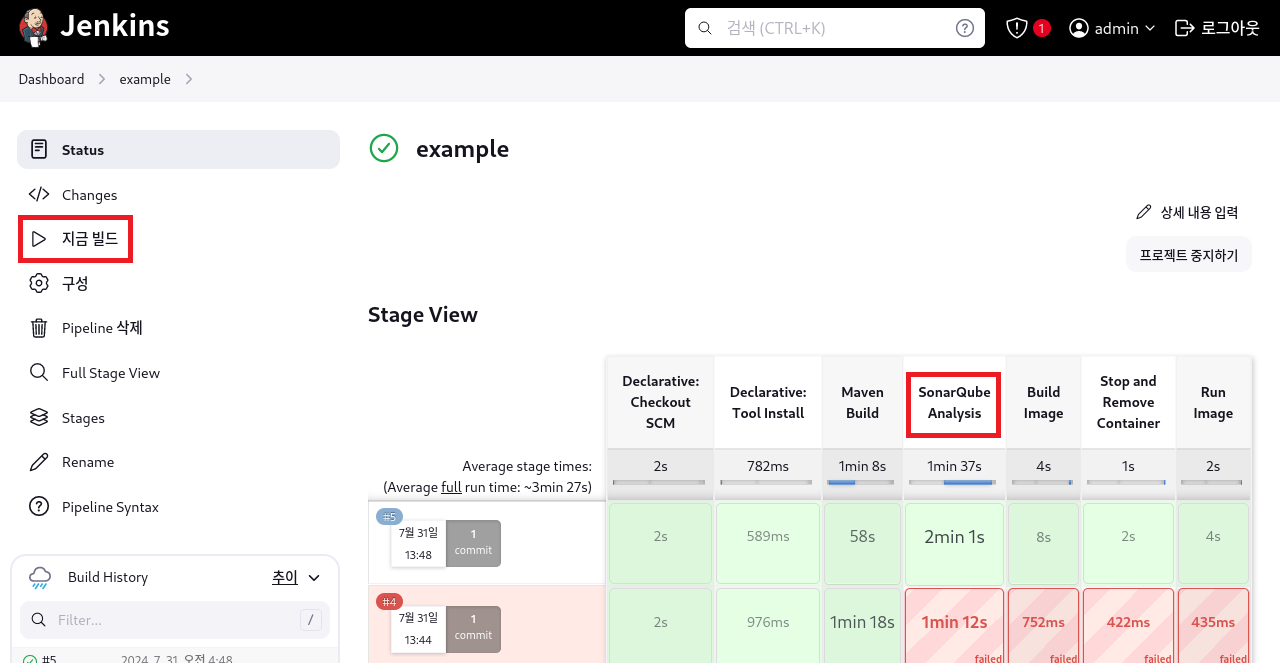
1) Jenkins 빌드
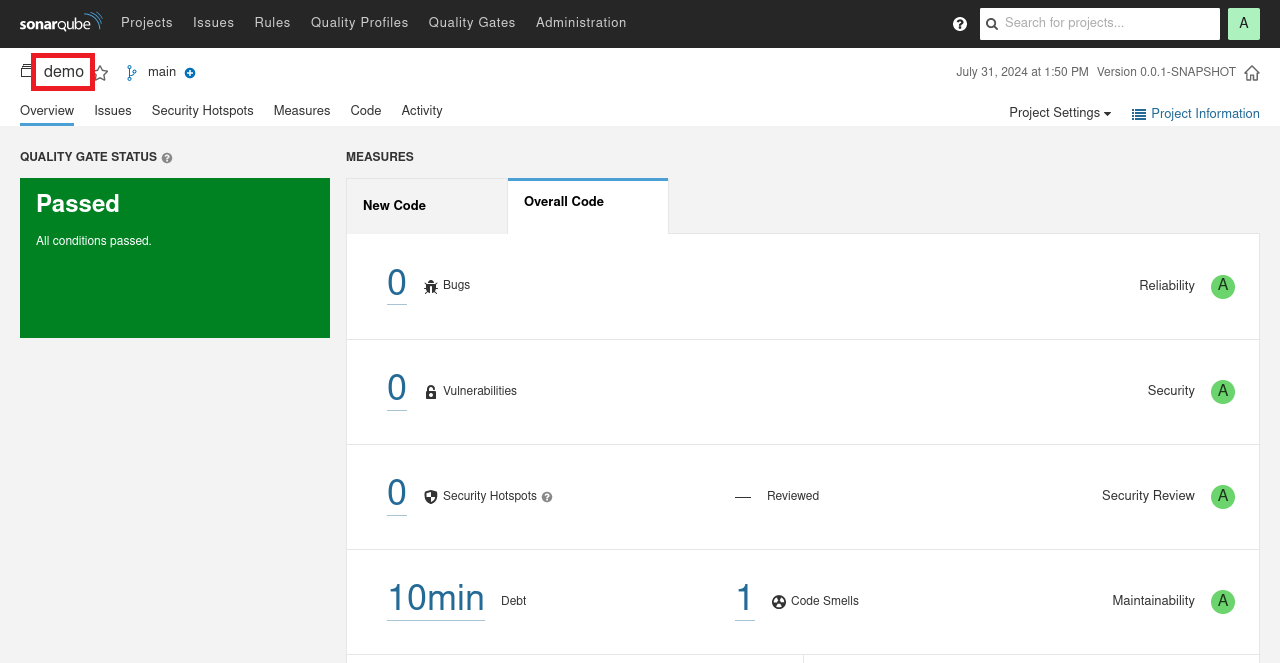
2) SonarQube 확인
SonarQube에서 프로젝트명을 example로 생성하였는데, demo로 변경된 이유는 프로젝트명이 demo로 되어 있기 때문이다.
[출처 및 참고]
This post is licensed under CC BY 4.0 by the author.


